BREAKING CHANGE: Switch from using `jiti` to import entrypoints during the build process by default to `vite-node`.
To continue using `jiti`, add the following to your `wxt.config.ts` file:
```ts
export default defineConfig({
entrypointLoader: "jiti",
})
```
NOTE: "jiti" is deprecated and will be removed in the next major version, `v0.20.0`.
BREAKING CHANGE: Out of an abundance of caution, I've marked this as a breaking change because permission generation has changed. ***If you list `host_permissions` in your `wxt.config.ts`'s manifest and have released your extension***, double check that your `permissions` and `host_permissions` have not changed for all browsers you target. Permission changes can cause the extension to be disabled on update, and can cause a drop in users, so be sure to double check for differences compared to the previous manifest version.
Thanks for taking the time to fill out this bug report!
- type:textarea
id:bug-description
attributes:
label:Describe the bug
description:A clear and concise description of what the bug is. If you intend to submit a PR for this issue, tell us in the description. Thanks!
placeholder:I am doing ... What I expect is ... What actually happening is ...
validations:
required:true
- type:textarea
id:reproduction
attributes:
label:Reproduction
description:|
Please provide a minimal reproduction. This can include:
- A PR with a failing test case
- A link to a github repo
- A ZIP you upload to this issue
A [minimal reproduction](https://stackoverflow.com/help/minimal-reproducible-example) is required ([Why?](https://antfu.me/posts/why-reproductions-are-required)). If a report is vague (e.g. just a generic error message) and has no reproduction or a partial reproduction, it will be closed immediately and labeled with as "needs-reproduction". Once a reproduction is provided, it will be re-opened.
placeholder:Reproduction URL or attach a ZIP
validations:
required:true
- type:textarea
id:reproduction-steps
attributes:
label:Steps to reproduce
description:Please provide any reproduction steps that may need to be described. E.g. if it happens only when running the dev or build script make sure it's clear which one to use.
placeholder:Run `npm install` followed by `npm run dev`
- type:textarea
id:system-info
attributes:
label:System Info
description:Output of `npx envinfo --system --browsers --binaries --npmPackages wxt,vite`
render:shell
placeholder:System, Binaries, Browsers
validations:
required:true
- type:dropdown
id:package-manager
attributes:
label:Used Package Manager
description:Select the used package manager
options:
- npm
- yarn
- pnpm
- bun
validations:
required:true
- type:checkboxes
id:checkboxes
attributes:
label:Validations
description:Before submitting the issue, please make sure you do the following
options:
- label:Read the [Contributing Guidelines](https://github.com/wxt-dev/wxt/blob/main/CONTRIBUTING.md).
required:true
- label:Read the [docs](https://wxt.dev/guide/installation.html).
required:true
- label:Check that there isn't [already an issue](https://github.com/wxt-dev/wxt/issues) that reports the same bug to avoid creating a duplicate.
required:true
- label:Check that this is a concrete bug. For Q&A open a [GitHub Discussion](https://github.com/wxt-dev/wxt/discussions) or join our [Discord Chat Server](https://discord.gg/ZFsZqGery9).
required:true
- label:The provided reproduction is a [minimal reproducible example](https://stackoverflow.com/help/minimal-reproducible-example) of the bug.
If you are changing the docs or fixing a bug, feel free to fork and open a PR.
If you want to add a new feature, please create an issue or discussion first so we can decide if the feature is inline with the vision for WXT.
## WXT's Vision
WXT is two things:
1. A build tool
2. A set of runtime utilities
The long term goal of WXT is provide an opinionated build tool that keeps WXT projects standard, while providing light-weight runtime utils that simplify a lot of the boilerplate/overhead when setting up a new extension.
I also want to provide a way for developers to use either one of those two things independently, and not require them to use both. This is why all of WXT's runtime utils are shipped as their own NPM packages, most of them not bundled inside the core `wxt` package. If you just want to use the packages, they're availalbe, and if you just want to use WXT's built tool, you don't have to import any of WXT's utilities, you can use your own.
> The few runtime utils shipped inside WXT are things that should be used by 90% of extensions. That said, they're also legacy utils left in from before I started creating separate NPM packages, and in the future, they may be removed from the core package.
## Conventional Commits
This project uses [Conventional Commits](https://www.conventionalcommits.org/en) to automate versioning. If you're a new contributor, don't worry about this. When you open a PR, a maintainer will change the PR's title so it's in the style of conventional commits, but that's all.
This project uses [Conventional Commit format](https://www.conventionalcommits.org/en/v1.0.0/) to automatically generate a changelog and better understand the changes in the project
Maintainers, commits to the `main` branch (either directly or via PRs) must be valid conventional commits.
Here are some examples of conventional commit messages:
-`feat: add new functionality`
-`fix: correct typos in code`
-`ci: add GitHub Actions for automated testing`
## Conventional PR Titles
The title of your pull request should follow the [conventional commit format](#conventional-commits). When a pull request is merged to the main branch, all changes are going to be squashed into a single commit. The message of this commit will be the title of the pull request. And for every release, the commit messages are used to generate the changelog.
## Breaking Changes Policy
A quick word on WXT's breaking changes policy. I am willing to make breaking changes, but they have to be for a good enough reason - they have to make WXT better as a whole, they can't be based on one opinion.
Breaking changes also require a major release. Major releases have happened once or twice a year, so after you merge your PR, you'll have to wait a little bit before it is released.
To make a breaking change:
1. Make sure you're PR is targeting the `major` branch
2. Add `!` after the conventional commit type (`fix!: ...`, `feat!: ...`, `chore!: ...`, etc) to indicate that it is a breaking change
3. At the top of the PR, provide documentation that will inform developers about the breaking change, why it was done, and how to migrate their extension so nothing breaks.
- This documentation will be put ["Upgrading WXT"](https://wxt.dev/guide/resources/upgrading.html) page in the docs, read through previous breaking change docs for an idea of what is required.
## Setup
@@ -32,18 +66,19 @@ Here are some helpful commands:
```sh
# Build WXT package
cd packages/wxt
pnpm build
```
```sh
# Build WXT package, then build demo extension
cd demo
cdpackages/wxt-demo
pnpm build
```
```sh
# Build WXT package, then start the demo extension in dev mode
cd demo
cdpackages/wxt-demo
pnpm dev
```
@@ -57,6 +92,21 @@ pnpm test
pnpm docs:dev
```
## Profiling
```sh
# Build the latest version
pnpm --filter wxt build
# CD to the demo directory
cd packages/wxt-demo
# 1. Generate a flamechart with 0x
pnpm dlx 0x node_modules/wxt/bin/wxt.mjs build
# 2. Inspect the process with chrome @ chrome://inspect
Documentation is written with VitePress, and is located in the `docs/` directory.
@@ -75,7 +125,7 @@ To run tests for a specific file, add the filename at the end of the test comman
pnpm test manifest-contents
```
Unit and E2E tests are ran together via [Vitest workspaces](https://vitest.dev/guide/#workspaces-support).
All test (unit and E2E) for all packages are ran together via [Vitest workspaces](https://vitest.dev/guide/#workspaces-support).
If you want to manually test a change, you can modify the demo project for your test, but please don't leave those changes committed once you open a PR.
@@ -90,7 +140,7 @@ npm run dev
npm run build
```
Note that templates are hardcoded to a specific version of `wxt` from NPM, they do not use the local version. PR checks will test your changes against the templates, but if you want to manually do it, update the package.json dependency:
Note that templates are hardcoded to a specific version of `wxt` from NPM, they do not use the local version. PR checks will test your PR's changes against the templates, but if you want to manually do it, update the package.json dependency:
```diff
"devDependencies": {
@@ -108,7 +158,58 @@ Then run `npm i` again.
To add a template, copy the vanilla template and give it a new name.
That's it. Once your template is merged, it will be available inside `wxt init` immediately. You don't need to release a new version of WXT to release a new template.
## Upgrading Dependencies
WXT has custom rules around what dependencies can be upgraded. Use the `scripts/upgrade-deps.ts` script to upgrade dependencies and follow these rules.
```sh
pnpm tsx scripts/upgrade-deps.ts
```
To see all the options, run:
```sh
pnpm tsx scripts/upgrade-deps.ts --help
```
## Install Unreleased Versions
This repo uses <https://pkg.pr.new> to publish versions of all it's packages for almost every commit. You can install them via:
```sh
npm i https://pkg.pr.new/[package-name]@[ref]
```
Or use one of the shorthands:
```sh
# Install the latest build of `wxt` from a PR:
npm i https://pkg.pr.new/wxt@1283
# Install the latest build of `@wxt-dev/module-react` on the `main` branch
npm i https://pkg.pr.new/@wxt-dev/module-react@main
# Install `@wxt-dev/storage` from a specific commit:
npm i https://pkg.pr.new/@wxt-dev/module-react@426f907
```
## Blog Posts
Anyone is welcome to submit a blog post on <https://wxt.dev/blog>!
> [!NOTE]
> Before starting on a blog post, please message Aaron on Discord or start a discussion on GitHub to get permission to write about a topic, but most topics are welcome: Major version updates, tutorials, etc.
- **English only**: Blog posts should be written in English. Unfortunately, our maintainers don't have the bandwidth right now to translate our docs, let alone blog posts. Sorry 😓
- **AI**: Please only use AI to translate or proof-read your blog post. Don't generate the whole thing... We don't want to publish that.
## Become a Maintainer
If you're interested in becoming a maintainer, send an email to Aaron at <aaronklinker1@gmail.com> with your github username saying you're interested. The process is very informal, I will add you quickly if you've contributed code or answered questions and helped out the community!
Maintainers don't have to just write code - they can manage issues, answer questsions, review PRs, organize and prioritize work - there's lots of ways for you to help out.
A couple of things for you to consider before merging a PR or giving the go-ahead on a feature proposal.
## Be picky about new features and packages
We are responsible for maintaining them and fixing related bugs after the PR is merged. The community can always release their own WXT modules or packages, not everything needs to be built into WXT.
## Prefer standards over customization
Don't merge PRs that just add another way to do something, like [this one](https://github.com/wxt-dev/wxt/pull/2053#issuecomment-3857010196).
WXT is opinionated, if you have questions about what is WXT's opinion or we need to create a new one, create an issue and @ me to discuss.
## PRs should be small and targeted
A PR should make one change. They should not make any unrelated changes outside of accomplishing the one thing. This makes PRs easier to review and they get merged more quickly - a win-win for everyone.
## `@wxt-dev/*` packages are separate
We can't make changes to these packages assuming people are using them only with WXT. For example, I almost missed [this PR](https://github.com/wxt-dev/wxt/pull/2049#issuecomment-3861251599).
I want these packages to be usable on their own so if people don't like WXT's build tool, they can still use our other awesome packages.
## Minimize dependencies
I don't like how heavy lots of frameworks are. It's unavoidable to a certain extent, but if you can do something without another dependency, try to.
If you need a dependency, look for one with zero dependencies and that's respectable.
## Look at milestones
I've organized WXT's long term plans into [milestones](https://github.com/wxt-dev/wxt/milestones), check those out to get an idea of my priorities for some of the larger features.
## Require tests
If someone opens a PR to fix a bug but doesn't include tests, don't merge the PR. Tests are required to prevent regressions and maintain a codebase long term.
## Ask for reproductions for bugs
You don't need to triage bugs if someone doesn't give you enough information. You can always ask for a repo with a reproduction or wait for more details.
If there's not an easy way to reproduce a bug, you're wasting your time triaging it. Just be mindful of your own time!
Here's an example of how to ask for a reproduction: <https://github.com/wxt-dev/wxt/issues/2064#issuecomment-3862579110>. You could be more blunt than this.
## Add yourself as a code owner
If you want to be responsible for a specific package or directory, add yourself to the [`.github/CODEOWNERS`](https://github.com/wxt-dev/wxt/blob/main/.github/CODEOWNERS) file to get added as a reviewer to PRs automatically. You can also add yourself to the default list to be added as a reviewer on all PRs.
## Releasing Package Updates
Releases are done with GitHub actions:
- Use the [Release workflow](https://github.com/wxt-dev/wxt/actions/workflows/release.yml) to release a single package in the monorepo. This automatically detects the version change with conventional commits, builds and uploads the package to NPM, and creates a GitHub release.
- Use the [Sync Releases workflow](https://github.com/wxt-dev/wxt/actions/workflows/sync-releases.yml) to sync the GitHub releases with changes to the changelog. To change a release, update the `CHANGELOG.md` file and run the workflow. It will sync the releases of a single package in the monorepo.
## Creating New Packages
Example PR: <https://github.com/wxt-dev/wxt/pull/2152>
1. Create the package.
2. Update CI workflow inputs.
3. Add docs page and version for "Other Packages" dropdown.
4. Merge the PR.
5. Tag the commit (look at other tags for pattern):
```sh
git tag <dir-name>-v<version>
git push --tags
```
6. Publish the package to NPM:
```sh
cd packages/<dir-name>
pnpm publish --access public
```
7. Create a basic release on GitHub mentioning the new package is available.
A couple of things to note:
- pkg.pr.new will fail on the original PR. It's fine to ignore and merge your PR as long as it fails due to your new package not being published to NPM yet.
- The regular release workflow DOES NOT WORK for new packages. You have to have at least one `<dir-name>-v<version>` tag created before you can run that workflow for your new package.
- You don't need to create a CHANGELOG.md file for the package, it will be created automatically after future changes are released via the normal release workflow.
Or see the [installation guide](https://wxt.dev/guide/installation.html) to get started with WXT.
@@ -57,12 +50,20 @@ Or see the [installation guide](https://wxt.dev/guide/installation.html) to get
- 🦾 Auto-imports
- 🤖 Automated publishing
- 🎨 Frontend framework agnostic: works with Vue, React, Svelte, etc
- 📦 [Module system](https://wxt.dev/guide/essentials/wxt-modules.html#overview) for reusing code between extensions
- 🖍️ Quickly bootstrap a new project
- 📏 Bundle analysis
- ⬇️ Download and bundle remote URL imports
## Sponsors
WXT is a [MIT-licensed](https://github.com/wxt-dev/wxt/blob/main/LICENSE) open source project with its ongoing development made possible entirely by the support of these awesome backers. If you'd like to join them, please consider [sponsoring WXT's development](https://github.com/sponsors/wxt-dev).
'ffglckbhfbfmdkefdmjbhpnffkcmlhdh',// Redirect Web - Automatically redirect pages or open them in another app
'eglpfhbhmelampoihamjomgkeobgdofl',// Capture It - Capture & Edit Screenshots
'jmghclbfbbapimhbgnpffbimphlpolnm',// Teams Chat Exporter
'jdcppdokgfbnhiacbeplahgnciahnhck',// Lofi BGM Player - Free lofi focus music for work & study
'cgpmbiiagnehkikhcbnhiagfomajncpa',// Margin - Annotate and highlight any webpage, with your notes saved to the decentralized AT Protocol.
'mfjdonmgmgcijagclnkfhmjiblbfjaid',// KeyFloat - Floating multilingual keyboard with native key mappings, drag, dark mode, sounds, and dynamic layouts for macOS & Windows
'dhiekgdaipindoapjmcnpompdknjeijf',// Glossy New Tab - Say Goodbye to Boring Tabs with live wallpapers
'lapnciffpekdengooeolaienkeoilfeo',// All API Hub – AI Relay & New API Manager - https://github.com/qixing-jk/all-api-hub
"WXT provides the best developer experience, making it quick, easy, and fun to develop chrome extensions for all browsers. With built-in utilties for building, zipping, and publishing your extension, it's easy to get started.";
"WXT provides the best developer experience, making it quick, easy, and fun to develop web extensions. With built-in utilities for building, zipping, and publishing your extension, it's easy to get started.";
The extension messaging APIs are difficult to learn. Let's go beyond the simple examples from Chrome and Firefox's documentation to build our own simple messaging system from scratch.
description: Learn how WXT's new <code>#imports</code> module works and how to use it.
authors:
- name: Aaron Klinker
github: aklinker1
date: 2024-12-06T14:39:00.000Z
---
WXT v0.20 introduced a new way of manually importing its APIs: **the `#imports` module**. This module was introduced to simplify import statements and provide more visibility into all the APIs WXT provides.
The `#imports` module is considered a "virtual module", because the file doesn't actually exist. At build-time, imports are split into individual statements for each API:
:::code-group
```ts [What you write]
import { defineContentScript, injectScript } from '#imports';
```
```ts [What the bundler sees]
import { defineContentScript } from 'wxt/utils/define-content-script';
import { injectScript } from 'wxt/utils/inject-script';
```
:::
Think of `#imports` as a convenient way to access all of WXT's APIs from one place, without impacting performance or bundle size.
This enables better tree-shaking compared to v0.19 and below.
:::tip Need to lookup the full import path of an API?
Open up your project's `.wxt/types/imports-module.d.ts` file.
:::
## Mocking
When writing tests, you might need to mock APIs from the `#imports` module. While mocking these APIs is very easy, it may not be immediately clear how to accomplish it.
Let's look at an example using Vitest. When [configured with `wxt/testing`](/guide/essentials/unit-testing#vitest), Vitest sees the same transformed code as the bundler. That means to mock an API from `#imports`, you need to call `vi.mock` with the real import path, not `#imports`:
```ts
import { injectScript } from '#imports';
import { vi } from 'vitest';
vi.mock('wxt/utils/inject-script')
const injectScriptMock = vi.mocked(injectScript);
injectScriptMock.mockReturnValueOnce(...);
```
## Conclusion
You don't have to use `#imports` if you don't like - you can continue importing APIs from their submodules. However, using `#imports` is the recommended approach moving forwards.
- As more APIs are added, you won't have to memorize additional import paths.
- If breaking changes are made to import paths in future major versions, `#imports` won't break.
Happy Coding 😄
> P.S. Yes, this is exactly how [Nuxt's `#imports`](https://nuxt.com/docs/guide/concepts/auto-imports#explicit-imports) works! We use the exact same library, [`unimport`](https://github.com/unjs/unimport).
---
[Discuss this blog post on Github](https://github.com/wxt-dev/wxt/discussions/1543).
For MV2, the background is added as a script to the background page. For MV3, the background becomes a service worker.
## Filenames
<EntrypointPatterns
:patterns="[
['background.[jt]s', 'background.js'],
['background/index.[jt]s', 'background.js'],
]"
/>
## Definition
:::warning
The main function of the background **_CANNOT BE ASYNC_**. Event listeners must be added syncronously on background startup. If your main function returns a promise, WXT will log an error.
:::
```ts
exportdefaultdefineBackground(()=>{
// Executed when background is loaded
});
```
or
```ts
exportdefaultdefineBackground({
// Set manifest options
persistent: undefined|true|false,
type:undefined|'module',
// Set include/exclude if the background should be removed from some builds
When defining multiple content scripts, content script entrypoints that have the same set of options will be merged into a single `content_script` item in the manifest.
## Context
Old content scripts are not automatically stopped when an extension updates and reloads. Often, this leads to "Invalidated context" errors in production when a content script from an old version of your extension tries to use a extension API.
WXT provides a utility for managing this process: `ContentScriptContext`. An instance of this class is provided to you automatically inside the `main` function of your content script.
```ts
exportdefaultdefineContentScript({
// ...
main(ctx: ContentScriptContext){
// Add custom listeners for stopping work
ctx.onInvalidated(()=>{
// ...
});
// Stop fetch requests
fetch('...url',{signal: ctx.signal});
// Timeout utilities
ctx.setTimeout(()=>{
// ...
},5e3);
ctx.setInterval(()=>{
// ...
},60e3);
},
});
```
The class extends [`AbortController`](https://developer.mozilla.org/en-US/docs/Web/API/AbortController) and provides other utilities for stopping a content script's logic once it becomes invalidated.
:::tip
When working with content scripts, **you should always use the `ctx` object to stop any async or future work.**
This prevents old content scripts from interfering with new content scripts, and prevents error messages from the console in production.
:::
## CSS
To include CSS with your content script, import the CSS file at the top of your entrypoint.
WXT can build CSS entrypoints individually. CSS entrypoints are always unlisted.
See [Content Script CSS](/entrypoints/content-scripts#css) documentation for the recomended approach to include CSS with a content script.
:::info
If the recommended approach doesn't work for your use case, you can use any of the filename patterns below to build the styles separate from the JS and use the [`transformManifest` hook](/api/wxt/interfaces/InlineConfig#transformmanifest) to manually add your CSS file to the manifest.
Chrome extensions allow you to add panels and side panes to the devtools window.
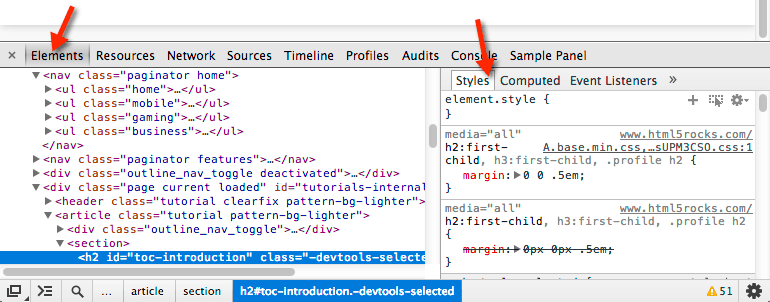
See the WXT's examples for a full walkthrough of extending the devtools window:
WXT has two directories for storing assets like CSS, images, or fonts.
-`<srcDir>/public`: Store files that will be copied into the output directory as-is
-`<srcDir>/assets`: Store files that will be processed by Vite during the build process
## `/public` Directory
Place static files like the extension icon or `_locales/` directory here. These files will be copied over to the output directory without being transformed by Vite.
```
<srcDir>
└─ public/
├─ icon-16.png
├─ icon-32.png
├─ icon-48.png
├─ icon-96.png
└─ icon-128.png
```
### Example
You can reference these files by using absolute paths in HTML files or `browser.runtime.getURL` in content scripts.
Files in the assets directory will be processed by Vite. They are imported in your source code, and will be transformed or renamed in the output directory.
WXT's main goal is improving the development experience (DX) of creating web extensions. There are two things WXT does differently:
1. Automatically opens a browser with the extension installed when starting development
2. Reload each part of the extension individually rather than reloading the entire extension
Opening a browser automatically makes it super easy to start and stop development without having to manually load the extension in your browser.
Reloading each part of the extension individually improves your iteration speed while developing UIs. This is because reloading the entire extension on every change will close the popup and any tabs open to an extension page, like options. If you save a file associated with a UI and a content script while working on the UI, it will randomly close because it needed to reload the extension when the content script changed. This interupts your development flow and is really annoying.
WXT solves this problem by reloading HTML pages and content scripts individually (when possible) to keep your UIs open while you develop them. This is a MV3 feature, so if you're developing a MV2 extension, you'll get the same dev experience as Plasmo.
:::info
Unfortunately, there isn't an API for reloading the background page/service worker individually, so if you change a file used by the background, the entire extension will reload. See [Issue #53](https://github.com/wxt-dev/wxt/issues/53) for more details.
WXT's behavior can be configured via the `wxt.config.ts` file. In this file, you can add Vite plugins, change the directory strucutre of your project, and set fields on your `manifest.json`.
## Config File
To configure WXT, create a `wxt.config.ts` file in your project root. It should have the following contents:
```ts
import{defineConfig}from'wxt';
exportdefaultdefineConfig({
// My WXT config
});
```
:::info
See the [Config reference](/api/wxt/interfaces/InlineConfig) for a full list of options.
:::
## Directory Config
WXT allows you to edit several directories to your liking:
-`root` (default: `process.cwd()`) - Root of the WXT project
-`srcDir` (default: `<rootDir>`) - Location of all your source code
-`entrypointsDir` (default: `<srcDir>/entrypoints`) - Folder containing all the entrypoints.
You want a `src/` directory to contain all your source code, and you want to rename `entrypoints/` → `entries/`:
```
<rootDir>
├─ src/
│ └─ entries/
│ ├─ background.ts
│ └─ ...
└─ wxt.config.ts
```
Your config would look like this:
```ts
import{defineConfig}from'wxt';
exportdefaultdefineConfig({
srcDir:'src',
entrypointsDir:'entries',
});
```
## Frontend Frameworks
Adding a framework like Vue, React, or Svelte is easy!
In the `wxt.config.ts` file, install and add the framework's Vite plugin to the config.
:::code-group
```ts [Vue]
import { defineConfig } from 'wxt';
import vue from '@vitejs/plugin-vue';
export default defineConfig({
vite: () => ({
plugins: [vue()],
}),
});
```
```ts [React]
import { defineConfig } from 'wxt';
import react from '@vitejs/plugin-react';
export default defineConfig({
vite: () => ({
plugins: [react()],
}),
});
```
```ts [Svelte]
import { defineConfig } from 'wxt';
import { svelte } from '@sveltejs/vite-plugin-svelte';
export default defineConfig({
vite: () => ({
plugins: [svelte()],
}),
});
```
:::
:::info
Internally, WXT runs `vite build` multiple times during a single build. It can't share the same instance of some plugins between each build, so a function is used to return completely new instances of each plugin for each build.
See the [API Reference](/api/wxt/client/functions/createIntegratedUi) for the complete list of options.
You can control how CSS is injected for an integrated content script UI with the [`cssInjectionMode`](/api/wxt/interfaces/ContentScriptBaseDefinition#cssinjectionmode) property. Usually, you'll want to leave it as `"manifest"`, the default, so the UI inherits its style from the website's CSS.
## Shadow Root
Often in web extensions, you don't want your content script's CSS affecting the page, or vise-versa. The [`ShadowRoot`](https://developer.mozilla.org/en-US/docs/Web/API/ShadowRoot) API is ideal for this.
WXT's [`createShadowRootUi`](/api/wxt/client/functions/createShadowRootUi) abstracts all the `ShadowRoot` setup away, making it easy to create UIs with isolated CSS. It also supports an optional `isolateEvents` parameter to further isolate user interactions.
To use `createShadowRootUi`, follow these steps:
1. Import your CSS file at the top of your content script
2. Set [`cssInjectionMode: "ui"`](/api/wxt/interfaces/ContentScriptBaseDefinition#cssinjectionmode) inside `defineContentScript`
3. Define your UI with `createShadowRootUi()`
4. Mount the UI so it is visible to users
:::code-group
```ts [Vanilla]
// 1. Import the style
import './style.css';
export default defineContentScript({
matches: ['<all_urls>'],
// 2. Set cssInjectionMode
cssInjectionMode: 'ui',
async main(ctx) {
// 3. Define your UI
const ui = await createShadowRootUi(ctx, {
name: 'example-ui',
anchor: '#anchor',
position: 'inline',
onMount(container) {
// Define how your UI will be mounted inside the container
const app = document.createElement('p');
app.textContent = 'Hello world!';
container.append(app);
},
});
// 4. Mount the UI
ui.mount();
},
});
```
```ts [Vue]
// 1. Import the style
import './style.css';
import { createApp } from 'vue';
import App from './App.vue';
export default defineContentScript({
matches: ['<all_urls>'],
// 2. Set cssInjectionMode
cssInjectionMode: 'ui',
async main(ctx) {
// 3. Define your UI
const ui = await createShadowRootUi(ctx, {
name: 'example-ui',
anchor: '#anchor',
position: 'inline',
onMount: (container) => {
// Define how your UI will be mounted inside the container
const app = createApp(App);
app.mount(container);
return app;
},
onRemove: (app) => {
// Unmount the app when the UI is removed
app.unmount();
},
});
// 4. Mount the UI
ui.mount();
},
});
```
```tsx [React]
// 1. Import the style
import './style.css';
import ReactDOM from 'react-dom/client';
import App from './App.tsx';
export default defineContentScript({
matches: ['<all_urls>'],
// 2. Set cssInjectionMode
cssInjectionMode: 'ui',
async main(ctx) {
// 3. Define your UI
const ui = await createShadowRootUi(ctx, {
name: 'example-ui',
position: 'inline',
anchor: '#anchor',
onMount: (container) => {
// Create a root on the UI container and render a component
See the [API Reference](/api/wxt/client/functions/createShadowRootUi) for the complete list of options.
:::info TailwindCSS
`createShadowRootUi` supports TailwindCSS out of the box! When importing the styles, just import the main CSS file containing the `@tailwind` directives, and everything will just work :+1:.
:::
## IFrame
If you don't need to run your UI in the same frame as the content script, you can use an IFrame to host your UI instead. Since an IFrame just hosts an HTML page, **_HMR is supported_**.
WXT provides a helper function, [`createIframeUi`](/api/wxt/client/functions/createIframeUi), which simplifies setting up the IFrame.
1. Create an HTML page that will be loaded into your IFrame
WXT's main goal is providing the best DX it possibly can. When running your extension in dev mode, each part of your extension is reloaded separately when possible.
| manifest.json | | | | 🟡 See [#16](https://github.com/wxt-dev/wxt/issues/16) |
| `wxt.config.ts` | | | | 🟡 See [#10](https://github.com/wxt-dev/wxt/issues/10) |
| `web-ext.config.ts` | | | | 🟡 See [#10](https://github.com/wxt-dev/wxt/issues/10) |
## Configure Browser Startup
WXT uses [`web-ext` by Mozilla](https://github.com/mozilla/web-ext) to automatically open a browser with the extension installed. You can configure the runner's behavior via the [`runner`](/api/wxt/interfaces/InlineConfig#runner) option, or in a separate gitignored file, `web-ext.config.ts`.
:::code-group
```ts [wxt.config.ts]
import { defineConfig } from 'wxt';
export default defineConfig({
runner: {
// Runner config
},
});
```
```ts [web-ext.config.ts]
import { defineRunnerConfig } from 'wxt';
export default defineRunnerConfig({
// Runner config
});
```
:::
### Browser Binaries
`web-ext`'s browser discovery is very limitted. By default, it only guesses at where Chrome and Firefox are installed. If you've customized your install locations, you may need to tell `web-ext` where the binaries/executables are located using the [`binaries` option](/api/wxt/interfaces/ExtensionRunnerConfig#binaries). For other Chromium based browsers, like Edge or Opera, you'll need to explicitly list them in the `binaries` option as well, otherwise they will open in Chrome by default.
```ts
// ~/web-ext.config.ts
import { defineRunnerConfig } from 'wxt';
export default defineRunnerConfig({
binaries: {
chrome: '/path/to/chrome-beta', // Use Chrome Beta instead of regular Chrome
firefox: 'firefoxdeveloperedition', // Use Firefox Developer Edition instead of regular Firefox
edge: '/path/to/edge', // Open MS Edge when running "wxt -b edge"
},
});
```
:::tip
When configuring browser binaries, it's helpful to put them in `~/web-ext.config.ts` instead of the project directory's `web-ext.config.ts` file. When placed in your home directory (`~/`), this config will be used by all WXT projects, so you only need to configure the binaries once.
:::
### Other options
You can customize other options as well, like startup URLs, profiles, or additional command line arguments:
For a full list of options, see the [API Reference](/api/wxt/interfaces/ExtensionRunnerConfig).
## Reload the Extension
Normally, to manually reload an extension, you have to visit `chrome://extensions` and click the reload button for your extension.
When running `wxt` command to start the dev server, WXT adds a keyboard shortcut, `ctrl+E` for Windows/Linux and `cmd+E` for Mac, that reloads the extension when pressed, without visiting `chrome://extensions`.
:::note
This shortcut is only available during development, and is not be added to your extension when running `wxt build` or `wxt-zip`.
:::
Some files were not shown because too many files have changed in this diff
Show More
Reference in New Issue
Block a user
Blocking a user prevents them from interacting with repositories, such as opening or commenting on pull requests or issues. Learn more about blocking a user.
 Aaron
Aaron


